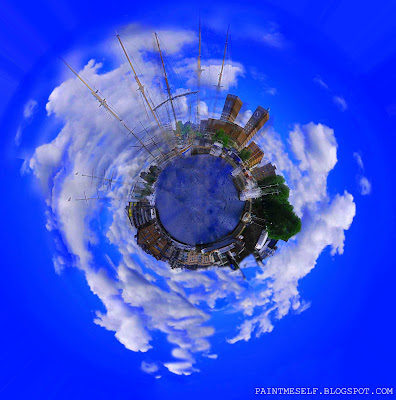
Working on an image for more than 5hours, exploring the way on how to create such an amazing and unique landscape image, finally i did it! Watching the video and getting on my CS2 step-by-step, now im here to make it easier for you to understand!
If you want a fun and creative alternative to regular panoramic images, then this is the technique for you! give it a try and you'll soon be creating your very own mini planets from your images. These effects are all the rage and a great way to do something different with your landscape images.
If you want a fun and creative alternative to regular panoramic images, then this is the technique for you! give it a try and you'll soon be creating your very own mini planets from your images. These effects are all the rage and a great way to do something different with your landscape images.
1.Stat an panoramic image

2.Squash your image
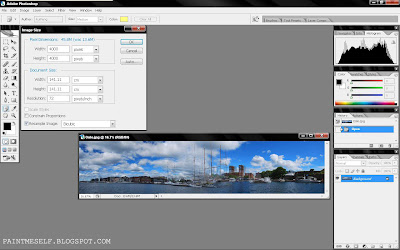
-Open an image then click Image-Resize-Image Size. Untick the box marked Constrain Propotions and change the Pixel Dimensions to 4000 pixels for both Width and Height. Click OK. Your image will now look like a squashed square image.

3.Flip & Spin the image
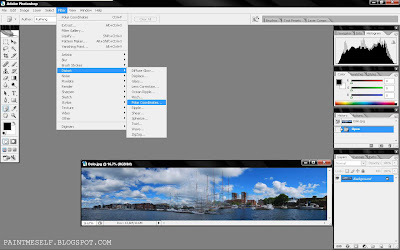
-We now need to turn the image upside down so click Image-Rotate-180. To make the planet shape, click Filter-Distort-Polar Coordinates. Choose the Rectangular to Polar setting and the click OK. You should now see your image folding in on itself to make the basic planet shape.

4.Hide the join
-The join between the wrapped edges needs to be hidden to make it look natural. Zoom in on the area and, with careful use of the Clone Stamp tool, remove the obvious sharp edge along the join.
5.Finally

*The side of the pic are going to end up next to each other, so the more alike they are the better. Also, try choosing easy-to-clone objects at either edge, trees are a great way to hide the join!

No comments:
Post a Comment